Category Archives: My Projects

After Christmas!

Hope you had a wonderful Christmas.   I love Christmas…but the day after, I am thinking about one thing–putting the decorations away! If you drove by my house this morning, you would have seen me down at the gate (in shorts of all things) taking down the greenery.  I left the wreaths up for a while longer, but the garland was turning brown and driving me crazy.   The wreaths are still holding their own.   And the pretty garland on my porch from this picture taken in early December?

Porch Decorated

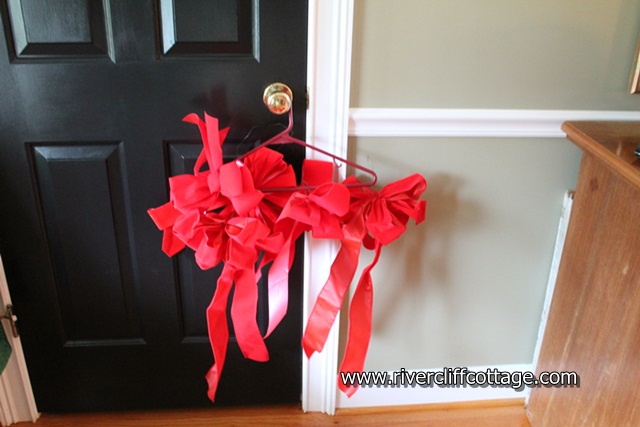
Gone! It had turned brown, too. I took care in removing my bows…I’ll use them again next year. I wired them to a coathanger and they’ll hang in the attic.

Bows Hanging

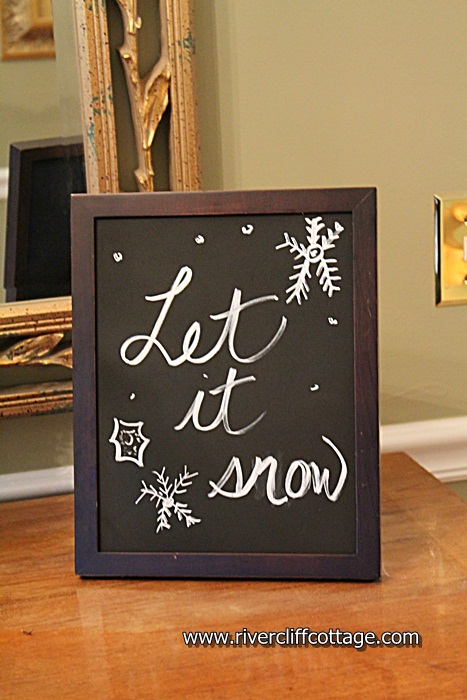
I’m not suggesting that Christmas be put away…it should remain inside of us all year long. However, for me…it’s time to replace decorations with something else. Snow!

Let It Snow

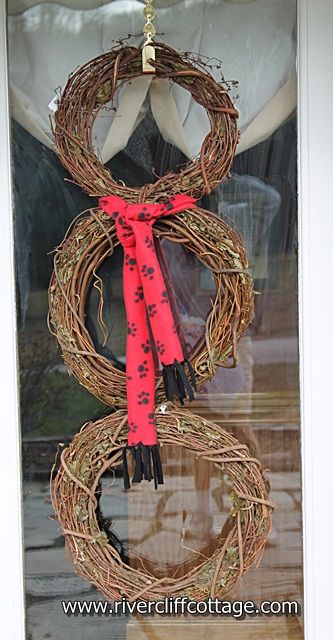
Mendota did not have a Christmas snow required to build a really pretty snowman…so I had to improvise. Do you like him?

Mr. Snowman

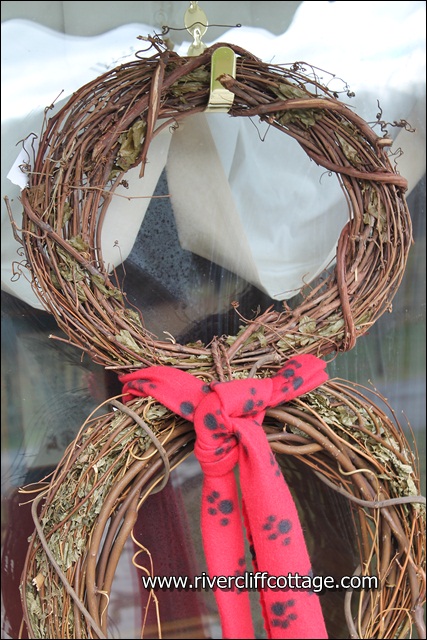
He’s not too tall. He’s rather plain. He could be Amish, but no…the red scarf is too sassy for that! He’s just an ordinary Mendota snowman made of three grapevine wreaths and a fleece scarf I made last year with doggy paw prints.

Snowman Wreaths

And do you think I’m organized since I’m putting the decorations away early? If you do, you might want to join us at our dining room table for dinner. Nice, isn’t it?

Messy Dining Room Table

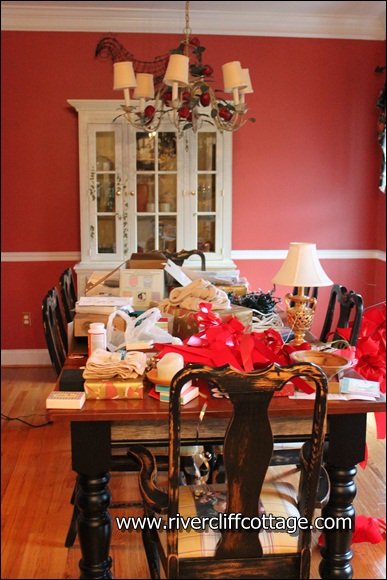
Somewhere in that messy picture above, there are Christmas cards I addressed but did not mail. I meant to mail them but Patsy was out of Christmas stamps. I could not mail these cards without Christmas stamps, and I would never, ever buy a stamp at any other place than the Mendota Post Office.

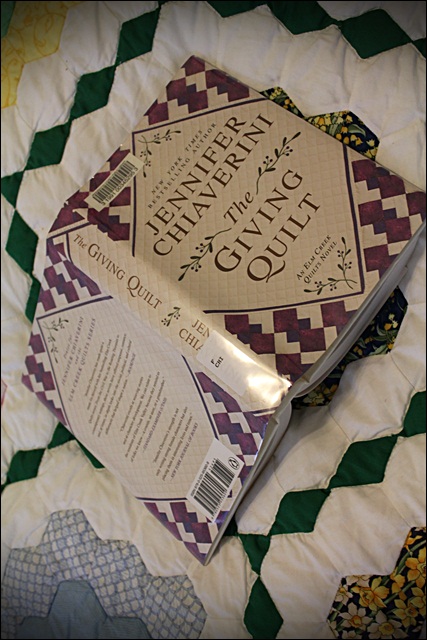
Nope…I’m not organizing or cleaning. I’m reading. I went by the Mendota Library last week with just this day in mind. I’m reading “The Giving Quilt” by Jennifer Chiaverini, and it has not let me down. I highly recommend this author. She writes about strong, imperfect women and their lasting friendships. She writes the Elm Creek Quilt series. They are set in Waterford, Pennsylvania, and there is a “red thread” which ties the books together. After reading all of her books, I feel that I know the characters very well. They are like friends!

The Giving Quilt

Are you reading anything good?


Loading

Wreaths Going Up and…Oh No…Mod Podge!

It’s me.   You know the one…the loser who had a wreath party and left one of her wreaths lying in the garage floor. The wreath party was over ten days ago. Maybe longer.

But today, that all changed.

I know it’s not a fancy wreath. It’s like me…a little askew here and there. It used to look like this…

Every time I see this picture and look at those two little pumpkins, I think Victoria’s Secret, Playtex and Vanity Fair.

It’s nice to use what you have. That’s what happened here…just stuff from the yard and some ribbon.

And lest you think that I’ve moved on from Mod Podge, I offer you this…

And one in the planning stages..

If I come across an easy craft that I can do, I work it to death!


Loading

It’s a Green…No Blue…Christmas!

Since I pretty much wasted today, I was anxious to show you my one accomplishment which is the chalkboard picture that is in my kitchen.  I updated it for Christmas.

This was done during commericals on Lifetime.  I’m loving the Christmas movies.

Really planned to WOW you with this chalkboard Christmas tree.

And I promise that it’s really red and green, but in my picture, it’s looking like a very patriotic Christmas!

I’ll retake tomorrow in better light.


ll

Loading

Living Room Christmas Mantle With Gourds!!

Do you like my mantle?

Christmas Mantle Featuring Painted Gourds

I am loving it!    Except for Laura Canter’s “Days of Christmas” ModgePodge blocks (which I sort of hijacked and copied in my last post), it’s just stuff I had. There are a few old Hobby Lobby red berry branches  in the vase along with other branches I brought in from outside.    There’s Uncle Johnny’s old Bible VDOT gave me, Laura’s Christmas blocks which I already mentioned, a plant from Lowe’s (my True Love), and my window pane frame that I sprayed with chalk paint spray and  blatantly copied Pottery Barn. There’s some leftover garland from the outside…and oh…just by chance….did you notice those gold things?

Large Gold

Guess what they are?? They are the same gourds that you saw in the late summer and fall.  Those gourds just keep showing up on this blog here and here and here and numerous other posts!!   Yikes..if you click on those links you’ll see I was learning how to insert a picture…they were sort of L..O..N..G  as in elgonated in those posts!!

Thursday I started throwing my gourds away. It was hard. They are volunteers. They come every year. Hundreds of them.  So willing to be picked and shared.

Anyway, I was carrying them outside and tossing them into the field thinking about how glad I didn’t have to pitch for a living.    Just before I went to gather the final ten or so gourds and do a lame softball roundup pitch, I had a brilliant idea! I would NOT throw the rest of my gourds away. I’d spray paint them! Gold! For Christmas!

Cute little green gourd.   It doesn’t know it has such a “bright”  (as in golden) future in this picture!

I took my little pal outside and sprayed painted him!  He’s the one just to the right of the larger orange gourd.   Lookin’ good!

Let me tell you, I was so happy as I spray painted these gourds. I started humming and jumping around spraying everything! It was so easy! I was almost hyperventilating at this point. It’s so seldom that something works out this well for me. Well, it didn’t work out all that well as had I had this thought a bit earlier, I’d not have thrown away the other 30 or 40 gourds. I would have had an amazing pile of gold gourds! For a moment, I thought about going and hunting them in the meadow.  I just had that thought for  a moment.

Instead, I focused on my little group.

They remind me of a little choir group if there was such a thing for gourds.   The big tall one is the senior choir leader.  The little round one, but larger than the others,  is second in command.

“Tra la la…we are gourds..

Behold…we are painted gold!!”

?Choir of Gourds

“Ring…Ring!”  Is that Nashville calling about my songwriting skills?   I thought not!

Thank you for reading RiverCliff Cottage.  I hope you like it.  Please tell others about it.  I’d like to get my number of readers up a bit.   Also, if you want to receive it in your email, just “subscribe” which is at the top of this post.

Today is the first Advent Sunday in this season.    I saw a banner on my neighbor’s house…it read “Immanuel..God With Us.”     I love living in rural America.


Loading

Crafty ModgePodge Blocks

I have a craft!   I’m so proud!    If  there is a craft that is easy enough for me to do, anyone can do it!   I’m not very crafty, but I’m very optimistic so I just keep trying!    Eventually I track down something I can do!

I wanted to make a Christmas message using wood blocks.  Since my husband has a hobby woodshop, there is usually wood I can get my hands on.

So Mike cut a board up for me in four squares.

Wood 2 x 4 blocks

Needed a little paint, so I went to my stash of paint test pots that I picked up for FREE this summer at Lowe’s and Home Depot. These are the samples that people buy…apparently lots of folks immediately know that they do not want the paint. They pay for the paint but leave it behind. This is where I enter the picture.   I ask for it. In my mind’s eye…I’d like to do a crafty project using ALL of my free paint. I have over 24 paint pots…different colors…lots of colors of white and cream. Yuck. Maybe I won’t start that project after all!

My Free Paint

I’ve been thinking about doing this for a while, so I bought some ModgePodge last month when I was at Michael’s in Kingsport. This bottle was about $9.

So I painted the blocks and then put a coat of ModgePodge on the blocks.  I’d taken scrapbook paper and cut it the same size of each block.

It’s kind of like wallpapering blocks! I liked it. It even smelled like wallpaper.

This isn’t a great picture, but behind the ModgePodge bottle, you can see where I had the scrapbook paper lying on each block. I didn’t want to buy anything (other than the ModgePodge) for this project so I used scrapbook paper that I had on hand. I had some “Christmas” scrapbook paper and some with a snow theme. I decided to make the word “Noel” with my four blocks and then make the word “Snow” on the reverse side.

After I ModgePodged the scrapbook paper on each block, I put a second coat on top of the scrapbook paper. The ModgePodge goes on kind of white but dries nice and clear! I then used a Cricut and made letters for each block but you could easily cut letters with scissors and put them on.

Here’s my Noel again.  Now that I know how easy this is, I’ll be making a few more and sanding them…making them a bit nicer.  I’m just so excited that this is easy and cute, and it worked!!    Yeah!!

Here’s my Snow…

Mike started messing with the blocks and had the nerve to pinch me on the rear! So…I swapped the blocks around and said this!

Loading

Annie Sloan Paint Project Day 3

Woo hoo! I am getting very close to having this project done!   I’ve been working on it a few days and talking about it in a past post. 

My end table began the week looking like this…

End Table Before Picture>

Tonight, getting close to the finish line, it looks like this.

It’s not done. I need to find an antique glass knob, and all of the antique stores I’ve visited tell me about the ones they USED to have!!   Also, this needs a final coat of clear wax with another good buffing.  Maybe a new lamp, too?

Tonight when I went down to the shop, the table was sitting there completely dry with two coats of Annie Sloan’s Chalk Paint in Duck Egg that I applied over the past few days. “Duck Egg” describes a green/blue/gray color.  My friend,  Sue, tells me it’s green, and I tell her it’s blue. 

So following the two coats of chalk paint, this piece was ready  for the waxing process. I’d read online tutorials on the waxing  process following the chalk paint application, so I knew that the next step was to apply a clear wax. Annie Sloan makes a full line of products, but I had only the paint. I used a different brand of clear wax and it worked fine.  With any project, there are a dozen ways to get to the end result.  Sometimes just starting is the hardest part. 

So, back to the waxing.   The clear wax has the consistency of a heavy lotion so I brushed it on.  I used a  paint brush we had on hand.

Clear Wax for Chalk Paint

Once this clear wax is applied, it needs to dry a set time. For the brand I used, which was Miss Mustard Seed’s clear wax product,  the time was 3-5 minutes.  I had this wax because it was included in a milk paint kit I won last week at the Southern Bloggers Conference.   Use what you have. 

After 3-5 minutes, I wiped the wax with a soft lint-free cloth. It was actually a pair of Mike’s old underwear. The next step was to follow with the glaze. It was called wax but it has the consistency of glaze in a pot.

So…Sue and I brushed this all over the end table and let it dry for about 3-5 minutes and wiped it off.

And another view…

The “antiquing” step is the place where your preference weighs in on how you apply the wax. If you want a piece of furniture that looks like you found it in  a coal bin, then lay it on thick! If you want something that looks slightly aged, take a lighter approach.

I’ll be showing you the big reveal for this piece when I find the knob. I’m going to cheat on the hunt and look on Ebay tonight. Is the internet great or what?

I’ve had fun doing this project.    When we bought this end table, we lived in Acton, Massachusetts, and it was ” hurry, hurry…make a house a home.”    I did not make the wisest purchases, but with this new look, I think I can enjoy this table for a long while!

<center>

Loading

Annie Sloan Paint Project Day Two

Let’s do something together…let’s watch paint dry…

Specifically, let’s watch “Duck Egg” Chalkpaint  by Annie Sloan.

My husband almost laid a duck egg when he figured out I was carrying around a piece of “perfectly good” furniture with intent to paint it…not just shifting furniture around.

What does he know?  Quack!


Tomorrow is waxing day. I don’t actually have the right wax so I’m using Miss Mustard Seed’s wax as a substitute.  I have no expertise in this so I’m just winging it.

If I fail, I can always redo it. I’ll be embarassed, though.

Loading

Annie Sloan Paint Project Day One

Annie Sloan Chalk Paint! I have been reading about it in all the pins, blogs and magazines for several months now, and last week I visited the Annie Sloan website to find a local dealer. I found one in Mendota! LIE! JOKE! We don’t even have a store of any kind in Mendota! However, there is someone who carries Annie Sloan nearby–in Johnson City, Tennessee. It’s called “The Sparrow’s Nest.”

Mendota, Virginia is about 45 miles from Knob Creek Road in Johnson City, Tennessee where the Sparrow’s Nest is located….just long enough to be considered an event!

We didn’t have any problem finding it.   It’s located in an historic old house that was used in the days of the Underground Railroad! If you visit the Sparrow’s Nest, ask to be shown the trap door that was used so many years ago. Shivers!

Sparrows Nest, Johnson City, Tennessee

I went in and quickly picked out the color of paint I wanted. It is a gray blue called “Duck Egg.” I’ll show it to you a bit further down on this post.

However, there were so many treasures at the Sparrow’s Next. Here’s a few…

Sparrow's Next Vignette

And this…

Sparrow's Nest Halloween Vignette

Lorrie Malcolm, the person who sold me the paint, is also an artist.   She both works and sells her things at the Sparrow’s Nest and mentioned that there were several locally made pieces in the shop.    She was working on a “felting” project which will result in a Thanksgiving turkey.  Here’s a picture of what she has completed so far….

Lorrie Malcolm's Felting at the Sparrow's Nest

Here’s another whimsical piece that Lorrie made.  It’s a really good likeness of “the man in the moon!” If I could afford this, I’d take it home. It was reasonably priced, but I’m on a tight budget right now!

Sparrow's Nest Man in the Moon

And this…for me…this was an inspiration piece…an old frame, a bit of burlap and a stencil and I could make this.  Or I could just go back to the Sparrow’s Nest and buy this one!

Sparrow's Nest Thankful Picture

And doesn’t everyone need a pair of these? I’ve got my eye on them. Ha!

Sparrow's Nest Eyeballs

Now..back to why I ended up at the Sparrow’s Nest. I brought the Annie Sloan chalk paint home.

Annie Sloan Duck Egg Paint

As soon as I got home with the paint, I went upstairs into the loft area of our house and came down the stairs grunting carrying an end table.  Mike looked at me as if I had a third eye and asked, “What are you doing?”  I’ve kept him a little in the dark about this project, so I just replied, “Nothing.” He said, “Oh no…not again!”

Here’s the table before I started painting it.  Boring.

End Table Before Picture

This paint is so pretty…

Annie Sloan Duck Egg

My friend, Sue Gardner, is staying with me for a few weeks, and she helped me. Here she is…painting away!

Sue Gardner painting

And here I am with phase I of this project done!   By the way…can you tell I’ve lost a few pounds? I’m on it baby!

Eva Beaule painting

The good thing about this paint is that there is no prep work. I dusted the end table off and started adding paint. Tomorrow morning we’ll add a second coat, and Friday we’ll probably add the wax. Hopefully, this will be beside the  bed in just a few days looking all fancy.

Another wonderful thing from today…our beautiful Clinch Mountain. I could not live where this mountain was not at my back. It’s getting fancy, too, all bright and beautiful for fall…

Thank you for reading RiverCliff Cottage.

Loading

Little Debbie Boxes Laundry Room Organization

It’s Saturday evening and I am parked on the couch…too exhausted to go to bed.

Today was the Mendota Heritage Festival, and while I planned to make a Barbie doll cake, I did not get it done. While I planned to be present at 10 am to help with the Health Fair, I did not get there until 11 am. While I planned to help with hotdogs from noon until 2 pm, I was told I wasn’t needed and I gratefully went home.

I worked very hard yesterday on multiple things. I cleaned house,spent time  reorganizing and refreshing my laundry room, doing laundry and worked on organizing our master bath. I also sat down and glanced at an article on the internet  entitled “Ten Tips for an ADD/ADHD Person To Keep A Clean House.” How did they know?

I do get the house clean, but I admit to doing it differently. I drag everything out and then I put everything away. I move along 3 or 4 things…and once in a while, they all get done!!

I took a good look at my laundry room this week. It’s very dull and boring. I haven’t paid any attention to this room. Ever.

After a good hard look, I made a list in my head of what would help this room. Here’s the result: (1) The paint is called “Celery”. With the white window treatment, white cabinets, and white washer and dryer, it looks institutional, yet I do not want to repaint the room. (2) I think red and black accents might help the room. (3) I have not been using the cabinet space well. The cabinet was full of lightbulbs instead of laundry supplies which were sitting on the dryer, etc.  I know..it’s crazy but it just happened…we did not intend to buy a gazillion different bulbs.  But we did. 

The first thing I went to is my Little Debbie Box inspiration.   While we do need to keep lightbulbs within easy reach, we don’t have to keep them all within easy reach. All but the minimum amount of lightbulbs will go in boxes above the cabinets.   By painting and embellishing the boxes, it will also  introduce black and red into the room.

Here’s the Little Debbie box in the before picture…

As I mentioned in prior posts, Mike picked up the Little Debbie boxes at Sam’s Club. I send him in to buy one thing but also to get a box or two to accompany the purchase! Feelin’ sooo smart!  The boxes are the perfect size….here they are..

The black and white polka dot ribbon on the boxes is an interesting story. I purchased my first ribbon in a three-yard spool at Hobby Lobby for $3.99. I didn’t have a set plan so I only bought one spool. I love ribbon and keep it on hand. Never know when a ribbon emergency might come up. Once I got moving on this idea, I needed more ribbon, and I found a comparable ribbon at Walmart for $2.99–same size and quality. The difference was price and, more importantly–the ribbon from Walmart was made in Pennsylvania while the ribbon from Hobby Lobby was made in China. Gasp! Walmart became my New Best Friend. It took two spools to do all four boxes. Because I don’t have a lot of money right now, I returned to what I had on hand to label the boxes which was wide-mouth canning jar lids and scrapbook paper.

Here’s another photo…there are actually four boxes but to capture all four in a photograph, I would have to climb out the window!


I got totally inspired while doing this project…so much so that I willingly washed the windows yesterday while doing everything else!! Mike did the outside but I did the inside at the same time. Normally, I would have found an excuse NOT to wash windows but my laundry room redo was making me so happy that I didn’t mind doing the windows. Color in a room is so important to the way you feel when you’re in the room. At least for me.  

I’ve made a curtain for the window and added a few other touches.

Another picture…

Finally, we had the Mendota Heritage Festival today. If cakewalks, quilts, baskets, original artwork, hotdogs, soup beans, baked bread and learning about the Mendota hawk count is more important than Fashion Week, the price of gasoline, or who had the best political speech, then this might be the place for you. It sure is the place for me.


Loading